Whitening Trays: Your Complete Guide to a Brighter Smile at Home
Introduction
You want a brighter smile, but the options feel overwhelming. Whitening trays offer a proven solution for lifting stains and revealing your natural radiance. Whether you choose custom-fitted trays from your dentist or an over-the-counter kit, understanding how whitening trays work makes all the difference. This guide walks you through everything you need to know—from selecting the right trays to maintaining your results—so you can smile with confidence.
What Are Whitening Trays and How Do They Work?
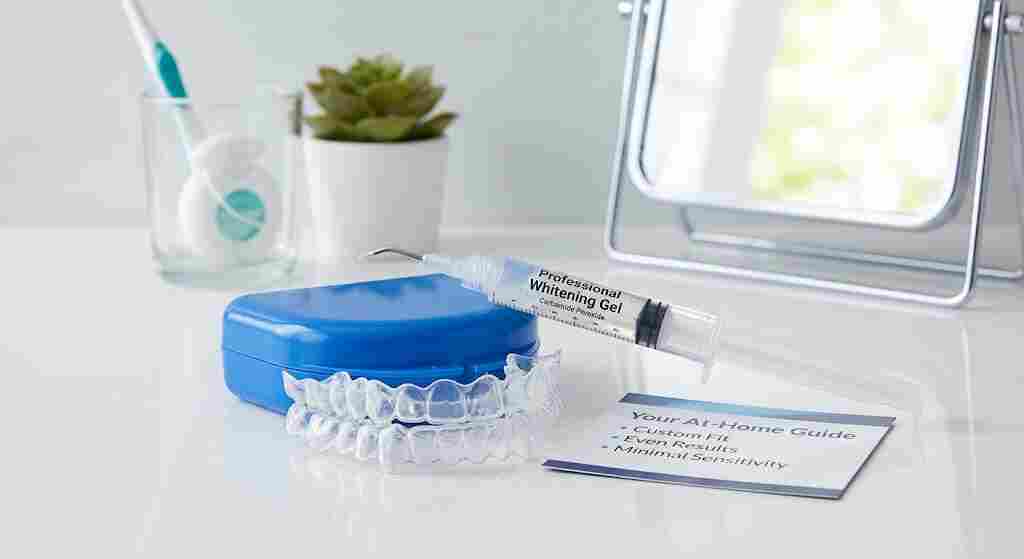
Whitening trays are dental appliances designed to hold whitening gel against your teeth for a set period. They resemble mouthguards and come in two main varieties: custom-fitted trays made by dental professionals and over-the-counter (OTC) options you can buy at drugstores. The mechanism is straightforward.
You place a peroxide-based gel—either hydrogen peroxide or carbamide peroxide—into the tray and wear it over your teeth. The gel breaks down stain molecules on your enamel, lifting discoloration from coffee, tea, wine, tobacco, and natural aging. The effectiveness of whitening trays depends on three factors: gel concentration, contact time, and tray fit. A snug fit keeps the gel where it belongs—on your teeth, not your gums.
Custom Whitening Trays vs. Over-the-Counter Trays
Choosing between custom whitening trays and OTC options significantly impacts your experience and results. Here is what sets them apart.
Custom Whitening Trays (Dentist-Provided):
- Made from impressions of your teeth for a perfect fit
- Use professional-strength gel (10-22% carbamide peroxide)
- Minimize gum irritation—5-10% risk vs. 15-30% with OTC
- Cost $300-600 initial investment
- Results: 6-7 shade changes over 2-4 weeks
Over-the-Counter Trays:
- One-size-fits-most or boil-and-bite design
- Use lower gel concentrations
- Higher risk of gel leakage and gum irritation
- Cost $30-60
- Results: more modest, often uneven
Custom whitening trays deliver superior results because they fit your unique dental anatomy. The gel stays precisely where it should, coverage is even, and gum exposure stays minimal.
The Science Behind Teeth Whitening: How Peroxide Gels Work
Understanding the science helps you appreciate why whitening trays are so effective. The active components of the majority of whitening gels are hydrogen peroxide and carbamide peroxide
When you wear whitening trays, the peroxide molecules penetrate your enamel and reach the dentin layer beneath. There, they break down chromophores—the molecules responsible for discoloration—through an oxidation reaction. This process literally changes the chemical structure of stain molecules, making them colorless.
When carbamide peroxide is applied to teeth, it decomposes into urea and hydrogen peroxide A 10% carbamide peroxide gel is roughly equivalent to 3.5% hydrogen peroxide. Professional custom whitening trays typically use 10-22% carbamide peroxide, while OTC products use lower concentrations.
The concentration matters because higher percentages penetrate deeper and work faster. However, they also require shorter wear times and carry a greater risk of sensitivity if not used properly.
Whitening Trays vs. Strips vs. Pens: Which Delivery Method Wins?
Each whitening delivery method serves different needs. Here is how whitening trays compare to other options.
Whitening Trays:
- Best for even, full-mouth coverage
- Hold gel against all tooth surfaces
- Ideal for significant stain removal
- Professional custom trays deliver the most dramatic results
Whitening Strips:
- Thin plastic strips coated with peroxide gel
- Best for simple, low-mess routines
- Cost $20-70, deliver 2-5 shade improvements
- Cannot reach between teeth, may cause uneven results
Whitening Pens:
- Targeted touch-ups for specific teeth
- Short contact time, less effective overall
- Best for maintenance between treatments
Clinical studies show that while strips can deliver significant whitening for front teeth, whitening trays provide more consistent results across all tooth surfaces. For deep, even whitening, trays remain the superior choice.
Benefits of Using Whitening Trays for At-Home Teeth Whitening
Whitening trays offer distinct advantages that make them a popular choice for smile enhancement.
Even Coverage: Trays hold gel against every tooth surface, eliminating the patchy results common with strips.
Customizable Treatment: With professional whitening trays, you control the wear time and frequency. Your dentist helps you find the right balance for your sensitivity level.
Cost-Effective Long-Term: While custom whitening trays cost more upfront, they last for months or even years with proper care. You only need to purchase replacement gel, making touch-ups affordable.
Professional-Grade Results at Home: Custom whitening trays use the same gels dentists use in-office, just at lower concentrations you can safely manage at home.
Reusability: Unlike disposable strips, custom whitening trays serve you for multiple treatment cycles.
Potential Side Effects: Sensitivity and Gum Irritation
Like any cosmetic treatment, whitening trays come with potential side effects. Understanding them helps you prepare and prevent issues.
Tooth Sensitivity: This affects 15-30% of patients using custom whitening trays. The peroxide penetrates enamel and can temporarily irritate the nerve endings inside your teeth.After treatment is finished, sensitivity usually goes away in a few days.
Gum Irritation: Occurs when gel leaks onto soft tissue. Custom whitening trays reduce this risk to 5-10%, compared to 15-30% with OTC trays. Poorly fitting trays allow gel to escape and burn gum tissue.
Enamel Changes: Overuse of whitening trays can damage enamel and lead to translucent teeth. The ADA warns that continuous use of whitening products can make enamel more permeable and reveal the yellow dentin underneath.
Prevention Strategies:
- Use the correct amount of gel—less is often more
- Wipe away excess gel immediately
- Choose custom whitening trays for the best fit
- Follow recommended wear times strictly
- Consider desensitizing gels containing potassium nitrate and fluoride
How to Choose the Right Whitening Trays for Your Smile
Selecting the right whitening trays depends on several factors. Consider these questions before making your choice.
What is your budget? Custom whitening trays cost $300-600, while OTC options run $30-60.
How significant is your staining? Surface stains from coffee or tea may respond to OTC trays. Deeper, age-related discoloration typically requires professional whitening trays.
Do you have sensitive teeth? Custom whitening trays allow your dentist to recommend lower concentrations and shorter wear times. Desensitizing agents can also be incorporated into your treatment plan.
Are your teeth crowded or uneven? One-size trays rarely fit properly on irregular dental arches. Custom whitening trays solve this problem by matching your exact contours.
What is your timeline? Custom whitening trays typically require 2-4 weeks for full results. If you need faster results, in-office whitening may be a better option.
Do you have crowns, veneers, or fillings? Whitening trays only work on natural teeth. Restorations will not change color, which can create mismatched results.
Step-by-Step Guide: How to Use Whitening Trays Correctly
Proper technique maximizes results and minimizes side effects. Follow these steps for safe, effective whitening with your trays.
Prepare Your Teeth
Brush and floss thoroughly at least 30 minutes before applying gel. Clean teeth allow the peroxide to penetrate more effectively.
Apply the Gel
Squeeze a small, continuous bead of gel into each tooth impression in the tray. Use approximately 1/3 to 1/2 of the syringe per arch. Too much gel causes leakage and gum irritation.
Insert the Trays
Place the trays over your teeth and gently press them into position. Pressing too firmly forces gel out of the tray. Remove any excess gel that oozes onto your gums with a soft, damp swab.
Wear as Directed
Follow your dentist’s instructions or the product guidelines for wear time. Typical sessions last 30-60 minutes for daytime use or overnight for lower-concentration formulas.
Remove and Clean
Once the allotted time has passed, take out the trays and give your mouth a thorough rinse. To get rid of any leftover gel, carefully brush your teeth.
Clean Your Trays
Rinse your whitening trays under cool or lukewarm water immediately after each use. Never use hot water, which can warp the tray material.
How to Prevent and Manage Tooth Sensitivity
Sensitivity doesn’t have to derail your whitening journey. These strategies help you stay comfortable throughout treatment.
Start Slowly: Begin with shorter wear times and gradually increase as your teeth adjust. Your dentist can help you find the right starting point.
Use Desensitizing Gel: Products containing 5% potassium nitrate and fluoride applied in the tray can reduce sensitivity in most patients and allow them to continue treatment.
Take Breaks: If sensitivity becomes uncomfortable, skip a day between treatments. This gives your teeth time to recover.
Choose Sensitivity Formulas: Many whitening trays systems offer formulations with built-in desensitizing agents like potassium nitrate.
Avoid Extremes: During treatment, avoid very hot or very cold foods and drinks, which can trigger sensitivity.
Consider Lower Concentrations: Higher peroxide concentrations work faster but increase sensitivity risk. Opt for lower concentrations if you have sensitive teeth.
Maintaining Your Whitening Trays for Long-Lasting Results
Proper care extends the life of your whitening trays and ensures hygienic use. Follow these maintenance tips.
Clean After Every Use: Rinse your whitening trays immediately after removal under cool or lukewarm water. Use your fingers or a very soft brush to remove any residue.
Avoid Hot Water: Never use boiling or hot water to clean your trays. Heat warps the plastic and ruins the fit.
Store Properly: Keep your whitening trays in their storage case when not in use. This prevents damage and keeps them clean.
Inspect Regularly: Check for cracks, warping, or looseness. Damaged whitening trays won’t fit properly and should be replaced.
Replace as Needed: With proper care, custom whitening trays can last for months or even years. However, replace them if the fit becomes compromised.
How Long Do Whitening Tray Results Last?
Results from whitening trays vary based on your habits and maintenance routine. Here is what to expect.
Initial Results: Most people notice changes within a few days.After one to two weeks of regular use, full results usually show themselves.
Duration: Professional whitening trays can deliver results that last 1-3 years with proper maintenance. OTC trays typically produce shorter-lasting effects.
Factors That Affect Longevity:
- Dietary habits (coffee, tea, red wine, and dark berries stain faster)
- Smoking or tobacco use
- Oral hygiene routine
- Frequency of touch-up treatments
Touch-Up Schedule: Most dentists recommend using your whitening trays for 1-2 nights every 6 months, or as needed based on observed relapse. Professional appointments every 12-18 months help maintain optimal results.
The combination of in-office whitening and at-home whitening trays produces longer-lasting results than either method alone.
Whitening Trays Before and After: What Results Can You Expect?
Realistic expectations help you appreciate the transformation whitening trays can deliver.
Typical Improvement: Custom whitening trays can achieve 6-7 shade changes over 4 weeks of consistent use. OTC trays typically produce 2-3 shade improvements.
Timeline: Results appear gradually. Most users see noticeable brightening within the first week, with full results emerging after 2-4 weeks.
Individual Variation: Your starting shade, stain type, and consistency of use all affect outcomes. Surface stains from coffee and tea respond faster than deep, age-related discoloration.
Patient Experiences: Many users report visible differences after just a few uses. One reviewer noted others noticed their teeth looked whiter after only 2-3 uses with no sensitivity. Another user saw genuine results after four or five sessions, especially on front teeth with years of coffee stains.
Maintenance Matters: Your results last longer when you avoid stain-causing foods and drinks during and immediately after treatment.
Frequently Asked Questions About Whitening Trays
Are whitening trays safe for your teeth?
Yes, whitening trays are safe when used as directed. The American Dental Association affirms that teeth whitening is typically safe when performed by a licensed professional or when using at-home products with the ADA Seal of Acceptance.
Custom whitening trays from your dentist are considered the safest at-home bleaching technique because they are supervised by a dental professional. However, overuse can damage enamel and gums, so follow recommended guidelines.
How long should you wear whitening trays each day?
Wear time depends on your specific whitening trays and gel concentration. Most systems require 30-60 minutes of daily wear over 7-14 days. Overnight options with lower-concentration formulas allow longer wear. Your dentist will provide specific instructions for your custom whitening trays. Never exceed the recommended wear time, as this increases sensitivity and irritation risk.
Do whitening trays work on crowns or veneers?
No, whitening trays only work on natural teeth. Crowns, veneers, fillings, and other restorations do not respond to peroxide gels. If you have restorations, discuss your options with your dentist. Whitening may create mismatched colors between your natural teeth and restorations.
Can you eat or drink while wearing whitening trays?
No, you should not eat or drink while wearing whitening trays. Food and beverages can displace the gel and reduce effectiveness. Some strips allow drinking water, but whitening trays require the gel to stay in place for the full wear time.
How much do custom whitening trays cost?
Custom whitening trays from a dentist typically cost $300-600 for the initial investment. This includes the impressions, tray fabrication, and professional-strength gel. Replacement gel costs less. While more expensive than OTC options, custom whitening trays deliver superior results with fewer side effects.
How often can you use whitening trays?
Most dentists recommend using whitening trays for one treatment cycle (typically 1-2 weeks) followed by touch-ups every 6 months or as needed. Continuous, frequent use can damage enamel. For optimal safety, limit professional whitening treatments to once or twice per year.
Conclusion
Whitening trays offer a proven, effective path to a brighter smile. Whether you choose custom-fitted trays from your dentist or an over-the-counter kit, understanding how whitening trays work helps you achieve the best possible results.
Remember that fit matters—custom whitening trays deliver superior coverage, minimize gum irritation, and produce more consistent whitening across all your teeth. Ready to transform your smile? Start by consulting your dentist about which whitening trays suit your needs and budget. Your perfect smile is closer than you think. Take the first step today—schedule a consultation and discover what whitening trays can do for you.